OAuth2 with Spring — Part 2: Getting started with Authorization Server
Spring team has recently released their authorization server. OAuth2 has always been a big topic of discussion and building or understanding authorization server has always been a mystery. In the Part 1 of this series, I described almost all the conceptual things you need to know about OAuth2. In this article of the series, I will try to demonstrate building an authorization server with client_credential grant type. I will start with auto configuration using configuration properties, explaining them, customizing the configuration by writing java codes. Let’s get started.
Setting up authorization server
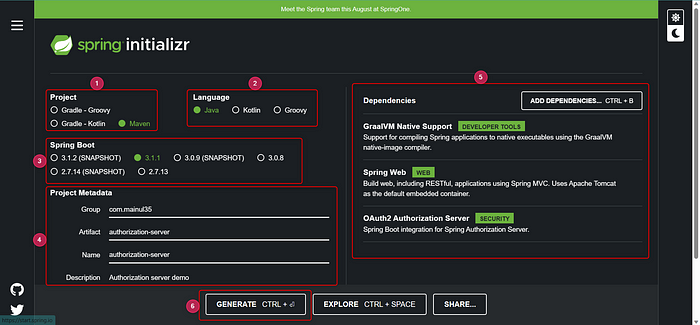
Let’s head over to Spring Initializr and generate the project.

For creating the authorization server, we need the Oauth2 Authorization Server dependency.
  <dependency>
   <groupId>org.springframework.boot</groupId>
   <artifactId>spring-boot-starter-oauth2-authorization-server</artifactId>
  </dependency>
Generate the project and import to your favorite IDE.
Now let’s add our desired configurations in the application.yml.
In Part 1, we learnt that we need a client to get token from the authorization server. Hence, we need the authorization server to have some client information. In the application.yml I will put the very minimum client information that are required to get the token and other authorization information.
spring:
  security:
    oauth2:
      authorization-server:
        client:
          client-1:
            registration:
              client-id: client
              client-secret: "{noop}secret"
              client-authentication-methods: client_secret_basic
              authorization-grant-types: client_credentials
According to the above configuration properties, we have registered a client client-1.
For client-1 we have defiened 4 properties —
- client-id
- client-secret
- client-authentication-methods: Basic authentication in this case (client_secret_basic)
- authorization-grant-types: The grant type to provide for requesting a new token. client_credentials in this case.
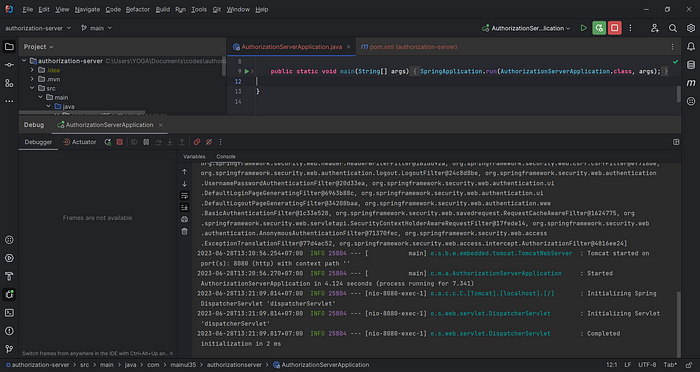
Now, we have to start the authorization server application.

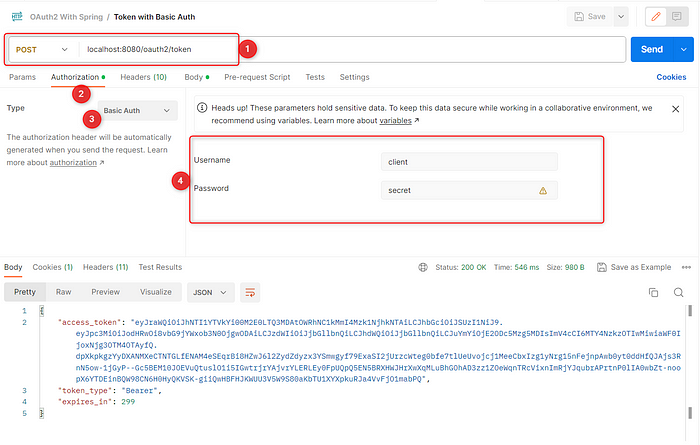
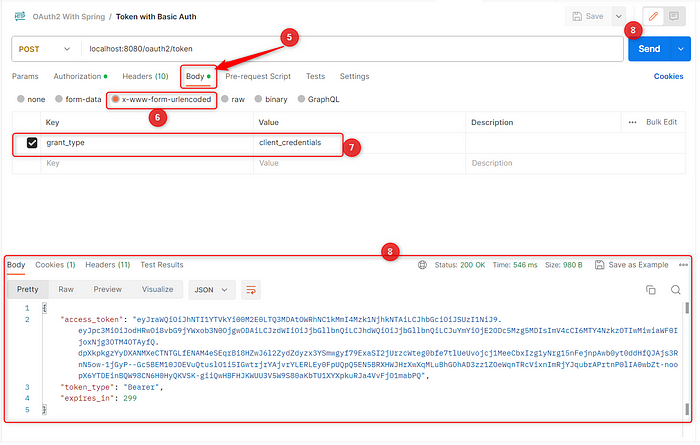
Next, in postman, let’s make a POST request to the /oauth2/token endpoint to get the token. Why /oauth2/token endpoint?


As we can see, once we submit the request, we will receive the token information in details.
Voila, our very minimal authorization server is now up and running. :D
Link to the project can be found here.
Questions
1. Where did we find the default token endpoint?
Answer: In the RFC of OAuth2, it mentions that the default token endpoint should be /token. However, It was difficult to find the default token endpoint for Spring Boot authorization Server. I had to go through the source code. In the class OAuth2TokenEndpointFilter, the default token endpoint is mentioned.
Thank you for reading with patience. On our next article we will try to create a resource server, fetch the token using authorization_code grant to access some private data.
